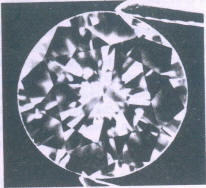
Diamond has a great affinity to grease. Small grease drops or dust particles often cling to its surface making observation of inner features more difficult. A loose diamond or in a engagement ring should never be touched with the hands, even freshly washed hands excrete grease which "sticks" to the diamond and can only be removed with difficulty. Every stone must be carefully cleaned before it is graded. Under normal circumstances this is done with a special diamond cleaning cloth. This is held between thumb and index finger, the diamond is breathed on and then rubbed in the cloth between the fingers. The cloths are washed from time to time in soapy Luke-warm water and rinsed well in clear water.
If there are traces of stubborn dirt, i.e. remains of modeling wax, the stone is immersed for a few minutes in pure alcohol and cleaned afterwards with the special cloth. Residues of the liquid should not be left to dry in the air, as they will leave fine traces on the surface. A good medium for cleaning of diamonds, well tested by the author, is the use of washing-up liquid. Two or three drops of an ordinary washing-up liquid are added to the cleaning bowl and the diamond is immersed for a few minutes. As washing-up liquid dissolved grease, the diamonds are well cleaned. Small pieces of fluff from the cleaning cloth which remain on the surface are easily removed by a fine lens brush as used in photography. The hairs of the brush must also not be touched by hand, they also take up grease and in turn pass it on to the diamond when brushing over it.
The cleaned stone is then laid table downwards onto the sorting block. The stone holder is removed from the microscope and adjusted so that it grips the girdle as closely as possible and offers the observer a large area of the stone unobscured for examination (Fig 165 a and b). The stone holder is fastened to the table and holding the diamond it is brought into the centre of field of view. The illumination of the stone is most favorable if the stone is held as closely as possible to the opening for emission of the light. In this way, most of the light falls onto the pavilion facets and the surface reflections are minimized.
When learning clarity grading one should get oneself used to proceeding systematically with the examination of internal features (Fig 166). If the eyes of the grader jump from one corner of the stone to the next, it is easy to overlook small defects. First the table must be examined. For this the stone is looked at with a 10 x. magnification perpendicular to the table and the table edges brought sharply into focus. Because of the relatively small resolution, the focus is then moved slowly from the table to the culet, so that all possible inclusions in every plane can be recognized.
 |
 |
| Fig 165a The brilliant in the right position: the tongs hide the stone only minimally. | Fig 165b The brilliant in the wrong position: the tongs hide large areas of the stone in the girdle zone |
 |
|
| Fig 166 Method of clarity grading | |
It is most important to raise and lower the tube minimally at all levels; at the same time the stone in the tongs is slightly rotated in order to alter the incidence of light, making any inclusion more easily discernable. The same method is also applied when a loupe is used, the grader "plays" with the tong holding the stone. After the table has been examined, it is the turn of the table facets. All facets are systematically examined one after another, moving the stone slightly. Then it is the turn of the main facets and lastly the girdle facets of the crown.
Most inclusions are visible through the table or the crown facets. Only those, which are positioned just underneath the girdle have to be discovered by examining the pavilion.
For this purpose the stone holder is rotated for 1800 around its horizontal axis, so that one can systematically examine the pavilion main facets and girdle facets for inclusions. Then the stone is taken out of its holder, rotated around 900 and placed back into the holder. In this position any areas formerly hidden by the clamp can be seen.
To localize inclusions, their position is described according to a clock face. The zenith is designated as twelve o'clock; if the stone is rotated on its horizontal axis for 180°, the same point observed from below now reads six o'clock (Fig 167).
The points three o'clock and nine o'clock remain in the same
position.
Lastly, the girdle is examined; especially external feature and symmetry
faults are observed. In order to do so, the diamond is very carefully
held between table and culet so that the culet is not damaged (Fig
168). One can then rotate stone with the thumb nail, or a needle, or
another aid, and examine it around the girdle.
 |
Fig 167 Inclusions are described as to their position on the clock face |
Fig 168 The girdle is observed from this
position |
| The technique of louping | Differentiating between surface features and inclusions |